The Homebrewery by the folks at NaturalCrit is a nifty tool I found a few years ago by accident. It’s purpose it to provide a free and fairly easy way to create “homebrew” material, specifically for D&D 5e. “Homebrew” is the term used for content written by people outside of official published material, usually used for one’s own games and not published. The Homebrewery uses Markdown and CSS. I’m somewhat familiar with CSS because I took a class in college that covered CSS and HTML. But that was years ago.
In this post, I’m going to cover some basics of getting started with The Homebrewery. I’ll highlight some things I’ve learned, and I’ll likely post about this tool in the future.
Getting Started
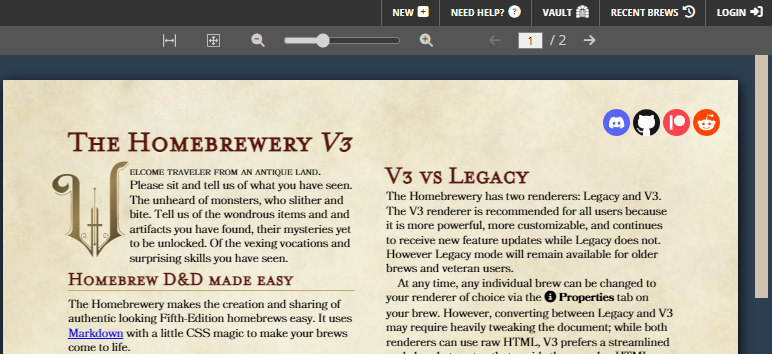
The first thing I suggest upon arriving to the site is to skim over the documentation for the current version. At the time of this post, that is V3. It provides a basic outline of how to use the tool.

We can return to this landing page any time, so let’s get started with making a new account. Click on “Login” at the top right of the page and create an account. I suggest signing in with Google because the app can sync your work with your Google Drive.
Once you have your account ready, navigate back to the landing page document and hover on “New +” at the top of the page.

The options in this menu are to create From Blank or From File. I’m went with From Blank because I didn’t have a pre-existing file to open. This will create a new brew for you to edit.
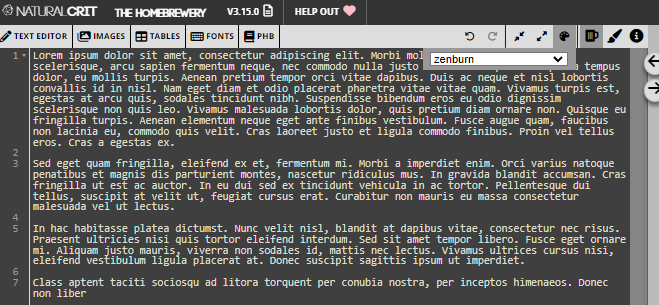
On the left, as you should have seen with the landing page earlier, you’ll notice a window for editing the Markup. But at the top there are a series of options that change depending on the menu you select. By default, we are viewing the Brew Editor. This is the window where you input your Markup and content and they will appear on the document in the window on the right. Right now, it is just full of Lorem ipsum, but we’ll get to that later.


We’ll look at each of the main navigation menu options. You can see that we have the Brew Editor opened because the little beer mug is highlighted gray. You can click on the little palette icon to the left of the Brew Editor icon to change the Editor Theme. I like the zenburn theme, as seen here:

You can always change the theme later.
Moving to the right, we have the Style Editor. In this context, the Style is referring to the CSS used to make your document look unique. Here is an example of a retro style I made by editing the CSS in this panel so that the document has a dark background and text that pops against it.

I’ll cover custom themes in a different post. For now, let’s move on to the next menu item: Properties. This is where you can:
- enter the title of your brew
- write a description
- provide a thumbnail that will be visible when viewing all your brews
- add tags that will also be visible when viewing all your brews, and which will be used when other people search for your brews in the Vault
- choose the system your brew uses, if it uses one
- select a language for your brew
- choose from a few different pre-existing themes
- decide fi you want to use the Legacy version or current V3
- Invite other authors to view and edit the brew
- publish your brew so it is searchable in the public Vault (any brew published this way is visible and searchable in the vault, so make sure you want your brew public before clicking this!)
- delete your brew
That covers the main navigation menu. We’ll get into more of the navigation options within each menu item in future posts.
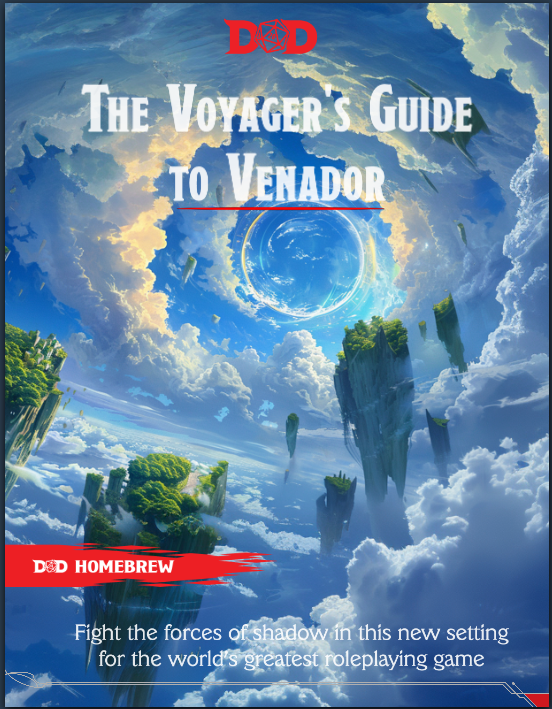
I’m going to end this post with a screenshot showing an example of what can be done using The Homebrewery.

-Zed
